A Self-Guided W Trek Itinerary
The Torres del Paine W Trek in Patagonia, Chile is phenomenal. The scenery is outstanding, the hiking each day is doable, and it’s just the most spectacular place. This W Trek Itinerary will help you plan an epic trip.
If you are looking for a full guide on The Torres del Paine W Trek, I have that too.
I hiked the W Trek with my best friend, and we had the most amazing time. We did the W trek self-guided, which was so easy to do! The trails are all clearly marked, and it’s a very popular place; you won’t go too long without seeing other hikers.
I actually started this travel blog after that trek. I felt that I hadn’t found a great blog to help us plan that trip, and we had some hiccups because of that. My hope is to help people do extraordinary outdoor things…
So let’s start with this W Trek Itinerary 🙂
Jump to W Trek Itinerary:
- What is The W Trek?
- Tips for a Perfect W Trek Itinerary
- When to Hike The W Trek
- Snapshot of The W Trek Itinerary:
- The Night Before You Start Your W Trek Itinerary
- Day 1: Puerto Natales to Grey
- Day 2: Suspension Bridges & Grey to Paine Grande
- Day 3: Paine Grande to Frances or Los Cuernos
- Day 4: Frances or Los Cuernos to Chileno + Optional Hike up to Las Torres
- Day 5: El Chileno + The Towers at Sunrise to Puerto Natales
What is The W Trek?
It is a 55 mile, typically 5 day trek through Torres del Paine National Park in Patagonia, Chile. You will stand before a glacier, mountains, the prettiest lakes, and more. I’ll include photos in this post to show you what an incredible place it is.
You can camp or stay in dormitories/refuges along the way.
Tips for a Perfect W Trek Itinerary
- Hike to Glacier Grey first and finish with The Towers — West to East. The Towers are the highlight of the hike, so I feel that they’re best saved for last. You have to pick which way to hike it ahead of time so you can book accommodations accordingly.
- Book everything in advance. Get your park pass, book your accommodations, and book your bus pass to the park.
- Pack well. Use a W Trek Packing List. Don’t forget important items, but don’t overpack. The more you bring, the heavier your pack and the harder your hike will be.
- Consider camping as much as possible. It is cheaper, and it really allows you to experience Patagonia’s magnificence.
- Do 5 days of hiking, 4 nights in the park.
- Be prepared for any and all types of weather. Bring allll the layers – and rain pants!
- Read my 12 Things to Know before Hiking the W post.
**If you purchase something from one of my links, I may earn a commission at no cost to you. I only link to thinks I use and love. Thanks for supporting my blog :)**
When to Hike The W Trek
Do the W Trek Itinerary in the summer for sure. Their summer is October through April. If you go outside of that time frame, you have to go with a guide. Winter can be brutal in Patagonia. We went in February, which is like mid-summer, but it was still very cold at times.
It helps if you can be a bit flexible with your dates. When you book your accommodations, you may be at the mercy of what’s available.
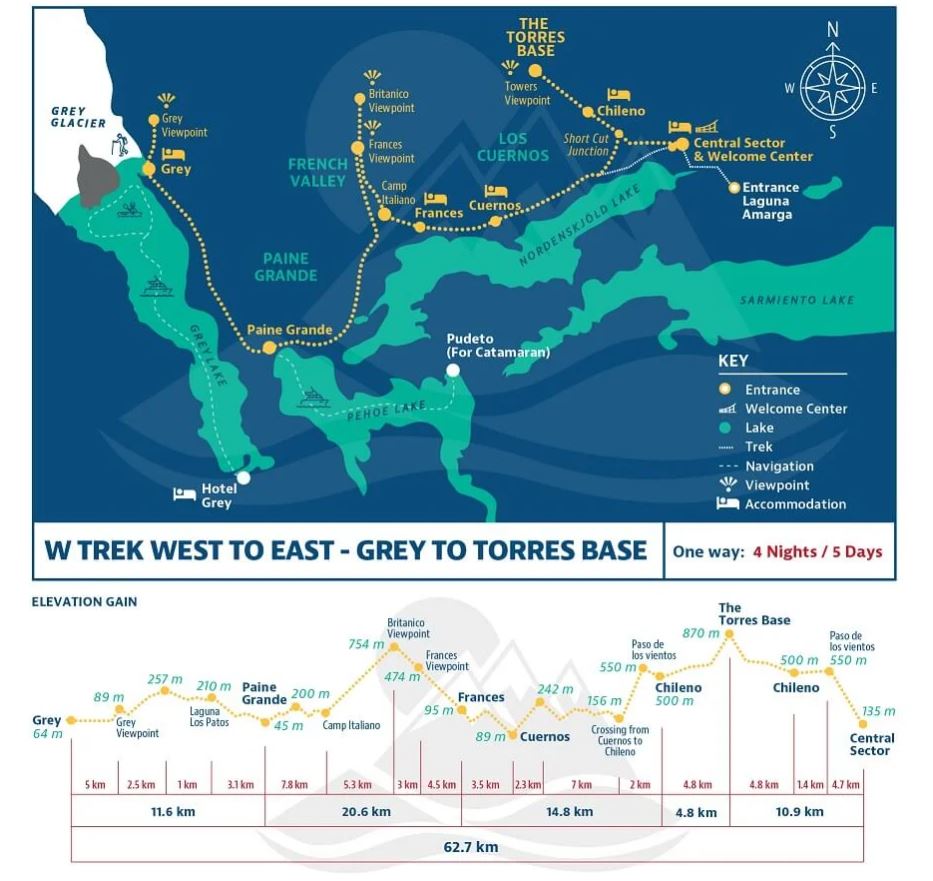
The official Torres del Paine map is the best one to view of the trek.
Snapshot of The W Trek Itinerary:
- Day 1: Puerto Natales to Grey — 6.8 miles/11km, 3.5 hours
- Day 2: Suspension Bridges & Grey to Paine Grande — 13.2 mi/21km, 9 hours
- Day 3: Paine Grande to Frances or Los Cuernos — 12.6-14.6 miles/20.3-23.3km, 9-11 hours
- Day 4: Frances or Los Cuernos to Chileno + Optional Hike up to Las Torres — 10.6-13.8 miles/17-22km, 7-9 hours
- Optional Extra Mileage to and from Base de las Torres: 5.4 miles/8.8km, 5 hours
- Day 5: El Chileno + The Towers at Sunrise to Puerto Natales — 3.2-8.6 miles/5-13.8km, 2-7 hours (lesser mileage and time if you chose to do The Towers the evening before instead.)
The Night Before You Start Your W Trek Itinerary
This is the time to get all your important ducks in a row:
- Set your morning stuff out and then pack your backpack.
- Have cash available. You’ll want extra. But you NEED:
- For the catamaran: $30 USD or 25,000 chilean pesos
- For the shuttle bus at the end: $6 USD or 4,000 chilean pesos
- Download the QR code for the park pass onto your phone. You will not have wifi at the park entrance.
- Make sure you have your bus reservations.
- Go over your hiking itinerary again. Check your accommodation reservations, screenshot them to your phone.
- Get a good night’s sleep!
Day 1: Puerto Natales to Grey
Hiking Mileage & Duration: 6.8 miles/11km, 3.5 hours
This day will start by getting into the park.
Puerto Natales is kind of the home base for starting your W Trek Itinerary.
There are 4 companies that can bus you to Torres del Paine National Park from Puerto Natales. The easiest (and safest in terms of guaranteeing a booking) option is to book from Bus Sur online. You can also go to the transportation hub in Puerto Natales if you didn’t have any luck getting Bus Sur tickets online.
You will want to arrive at Pudeto (Paine Grande), so purchase that ticket. It is a 3 hour bus ride. Keep in mind that you will need to take the same bus company on your return trip.
Day 1:
6:30am: Arrive to the transportation hub .
6:45am: Your bus leaves. Settle in for a 3 hour bus trip to your magical destination.
9:45am: Arrive at Torres del Paine National Park. (AHH it is so beautiful!) Show them your QR code to get into the park, then make your way to the catamaran.
10am: Pay for and board the catamaran. You must have cash; no reservations taken ahead of time.
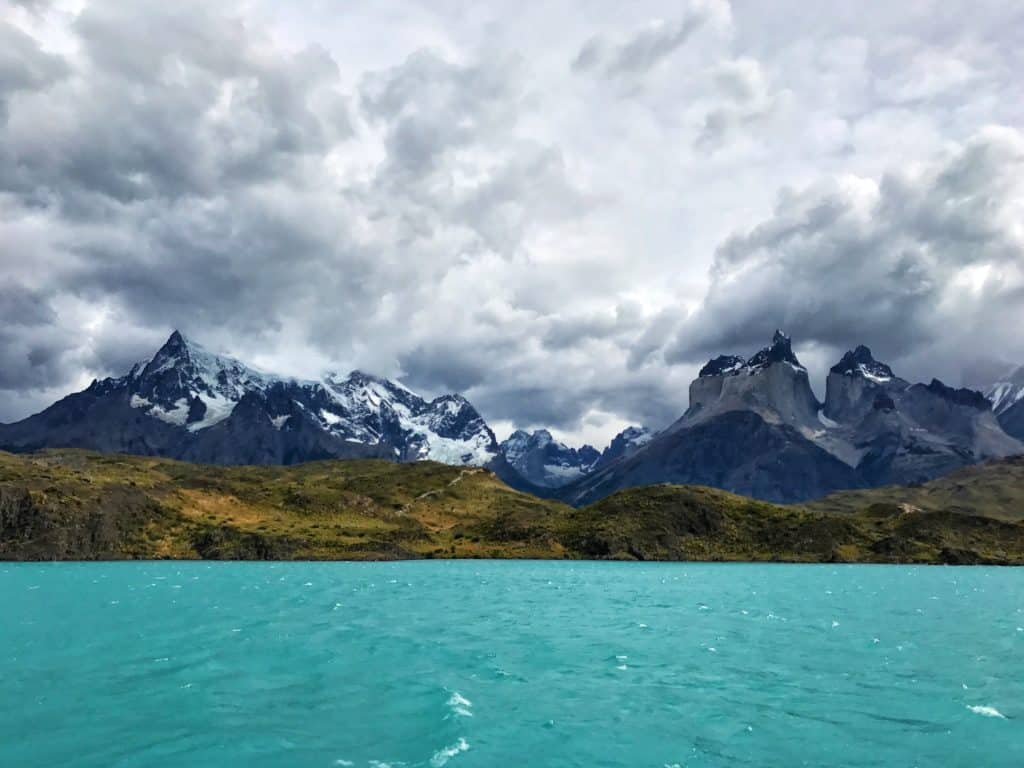
10:30am: Your catamaran departs. Enjoy the epic scenery during this 30 minute ride. I thought the water truly looked fake. It was so blue.
11:30ish am: Arrive at Paine Grande. Talk to the front desk and leave any items that you don’t need for Grey/the next 24 hours. I’m not sure the cost now, but it used to be $5 USD to leave stuff in a big storage room. Eat and fuel up at the lodge before starting your hike.
12:30ish pm: Hike the 6.8 miles/11km up to Grey, 3.5 hours. It’s pretty uphill, but enjoy the beautiful views.
4:30ish pm: Arrive at Grey. There’s a little trail that takes you closer to the glacier that I recommend hiking (without packs) while it’s still light out. Set up camp, relax, cook dinner, shower (optional), and go to sleep early.
Day 2: Suspension Bridges & Grey to Paine Grande
Hiking Mileage & Duration: 13.2 mi/21km, 9 hours
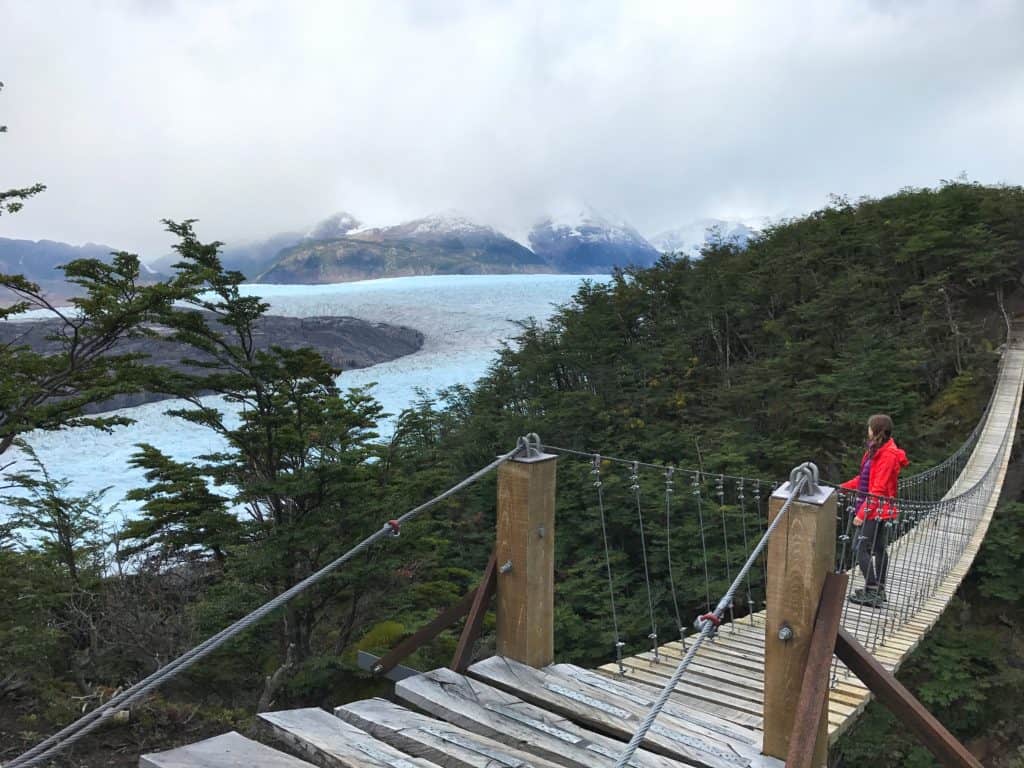
8ish am: Leave your pack at Grey Lodge and start hiking up to the suspension bridges. This feels a little crazy because it is “extra” hiking out of your way, but you must do it. The suspension bridges are SO COOL and you get so much closer to the glacier. It is 6.4 mi/10km round trip to the 2nd suspension bridge and will take 5ish hours.
1pm: Have lunch at Grey and grab your pack.
2pm: Start hike to Paine Grande. 6.8mi/11km, 3.5 hours.
5:30pm: Arrive in Paine Grande (be prepared for lots of wind!), set up your tent, make/eat dinner, relax, and go to bed early. The next day is a long day of hiking.
Day 3: Paine Grande to Frances or Los Cuernos
Hiking Mileage & Duration: 12.6-14.6 miles/20.3-23.3km, 9-11 hours
Day 3 mileage will depend on where you are staying for the night. We’ll discuss a couple options. I do recommend starting early because you’ll likely have a lot of miles to cover.
7am: Start hike to Italiano. 4.7mi/7.5km, 2.5 hours. Enjoy every amazing view.
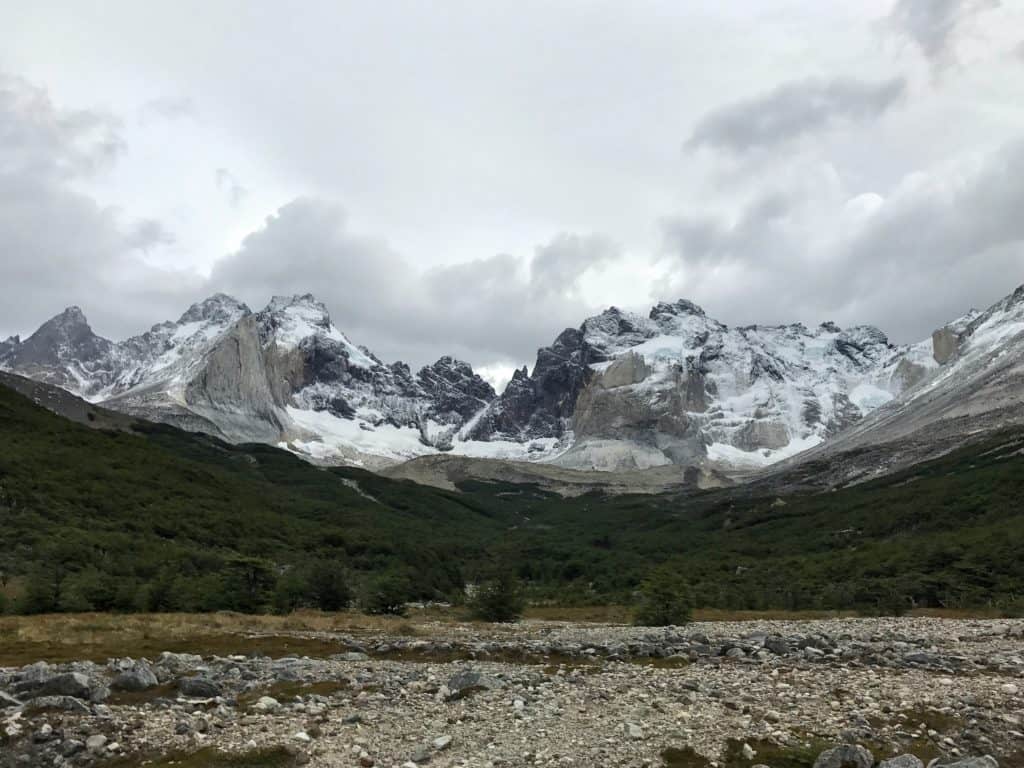
9:30am: Eat a snack and leave your pack at Italiano. Trust me, you do not want your pack for this part of the hike. Hike up to Britanico lookout. Again, it’s a must.* It’s technically the middle part of the W, and it offers such epic views of the mountains. 6.7mi/10.8km, 6 hours of hiking. It’s SO uphill. Stop for lunch at some point during this part.
*If the weather is horrendous, you could skip the Britanico lookout. The views are incredible, but if it’s cloudy and the weather sucks, it may not be worth all the uphill. Totally up to you.
3:30pm: Pick your pack up from Italiano. Hike to either Frances or Los Cuernos, depending on where you found accommodations. To Frances: 1.2mi/2km, 30 minutes. Or To Los Cuernos: 3.2mi/5km, 2 hours.
4-6pm: Arrive at either Frances or Los Cuernos. Do the usual.
I can’t really say whether Frances or Los Cuernos is better for this night. We stayed at Frances and hiked out at dawn the next morning. The sunrise on the lake during the hike to Los Cuernos was cry-worthy, but I’m sure the lake is pretty at any time.
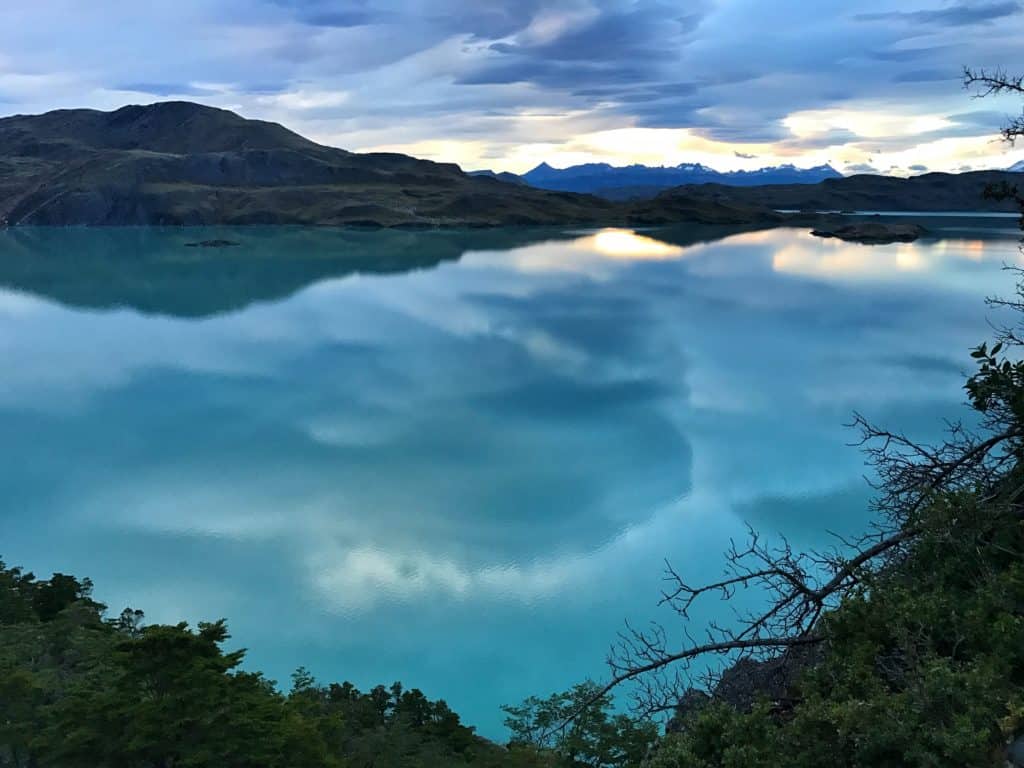
Day 4: Frances or Los Cuernos to Chileno + Optional Hike up to Las Torres
Hiking Mileage & Duration: 10.6-13.8 miles/17-22km, 7-9 hours
Optional Extra Mileage to and from Base de las Torres: 5.4 miles/8.8km, 5 hours
There are some variations for Day 4. If you start at Frances, you will have a longer hike to Chileno and need to consider those additional miles.
The big question, though, is if you want to hike to The Towers on Day 4 or wait and go for sunrise on Day 5.
A lot of people hike up to the towers on Day 5 for sunrise. They start hiking very early and hope for perfect, beautiful conditions for sunrise. And I can’t blame them — the pictures I have seen of the sun rising and hitting the towers are SO GOOD.
BUT. You should think about the weather (if the weather is bad, the towers can be completely blocked by clouds/fog), if you can safely hike in the dark (it’s not an easy hike to the towers), and if you really want to get up that early. We went back and forth on this and were so conflicted.
Ultimately, the weather looked really crappy for the next morning but was good for that evening. We hiked the 13.8 miles from Los Cuernos to Chileno, dropped our packs, and BOOKED IT up to The Towers. The weather was worsening, and we were so worried we’d lose our chance to see the epic view. Despite our exhaustion, we hiked so fast and made it to just the most spectacular view.
Seriously. My eyes still fill with tears thinking about seeing that view. The pictures do not do it justice.
I have no regrets about skipping the sunrise hike the next morning; the weather worked out in our favor the way we did it.
Also, if you’re in tip-top shape, you could realistically do both. An evening hike and a sunrise hike to really get your fill of the epic view.
Ok, Day 4:
8am: Start hike to Chileno from Los Cuernos. Eat a packed lunch along the way.
** If you don’t plan to hike to The Towers today, you can start hiking later in the morning. **
**If you are starting your hike from Frances and want to do The Towers today, start your hike 2 hours earlier – sorryyyy.**
3pm: Arrive at Chileno. Check in and drop your packs.
3:30pm: Start hike up to The Towers.
8:30pm: Get back to Chileno, eat dinner, SLEEP.
**If you aren’t hiking to The Towers on Day 4 but on Day 5 instead, pack a bag with warm clothes, your headlamp, and a snack for the next morning. Go to bed as early as you can.**
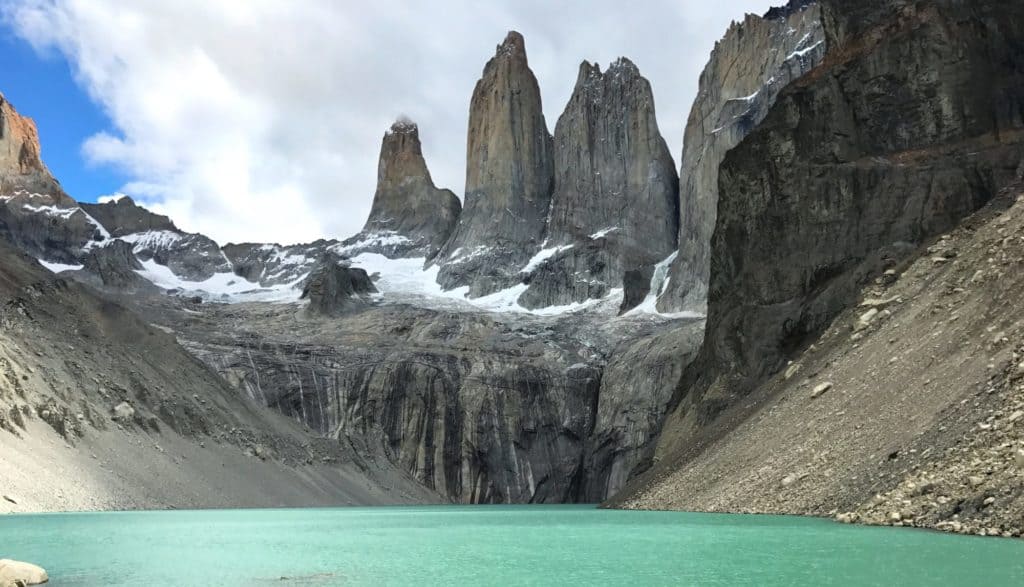
Day 5: El Chileno + The Towers at Sunrise to Puerto Natales
Hiking Mileage & Duration: 3.2-8.6 miles/5-13.8km, 2-7 hours
** The lesser mileage and time is if you did The Towers the day before and are just hiking to Las Torres Hotel **
For sunrise at The Towers:
4:30am: Start hike up to The Towers. Adjust this time based on when the sun rises during your visit. It will take you around 2.5 hours to get to your destination.
7am: Arrive at The Towers, wait for sunrise. ADMIRE THE BEAUTY.
8am: Leave The Towers and hike back to Chileno.
10:30am: Eat breakfast and pack up your stuff from Chileno
11:30am: Hike to Las Torres Hotel.
1:30pm: Arrive at Las Torres Hotel. Hike a bit toward Torres Central to the Welcome Center. You can pay cash (less than $10) to take a 30 minute shuttle to Laguna Amarga. You can also hike another 90 minutes to Laguna Amarga instead. Once you get there, you’ll take your bus back to Puerto Natales.
2pm: Take shuttle to Laguna Amarga.
2:30pm: Arrive at Laguna Amarga and find your bus to Puerto Natales. Remember that you’ll be using the same bus company that you used to get into the park. Check the bus schedules ahead of time to know which one you need to catch.
4pm: Bus to Puerto Natales.
6:30pm: Arrive in Puerto Natales. Have a drink and a good meal. Celebrate what you just accomplished!
W Trek Itinerary
Well, there ya have it. 5 days of incredible scenery, tired legs, and a break from the real world.
If you have any questions, please ask in the comments below!
Happy Hiking!!


Comments? Ideas? Advice? Leave some!